Showing posts with label Quilts. Show all posts

Saturday, September 09, 2017

Winnie the Pooh

As I mentioned a while back, because my direct report was "too busy" to organize an easy-peasy work baby shower for her assistant, I ended up doing it. Naturally, because of all that, I didn't quite get the last stitches in the binding of the baby quilt started back in April. And it's not even that big.

I fear the picture of the extremely adorable quilt label is on my phone (I really, really hope so) - the pictures below were taken with my actual camera (novel thought, I know) on the floor at work before I put the quilt in the gift bag. Nothing like waiting until the last moment to take pictures. I used both the camera and the phone, covering my bases as the camera on the phone is actually a better one than the Canon, which is at least seven years old, most likely more. You know how quickly things change in the digital world.

The Winnie the Pooh fabric squares were an impulse buy back in January when a pack of 40, five-inch squares were the daily deal at a favorite online quilt store. Silly me, I should have bought two sets, as when they are part of the daily deal, it usually means the retailer is running out of the fabric and it will soon be gone forever.

Which is what I found in April when I went to get some yardage to make things big enough for an actual quilt. The honeycomb fabric on the ends, which I don't particularly like, was the only fabric left from the entire line. Well, since this was all impulse anyway, I rolled with it.

Full quilt
There were forty-two of the Winnie the Pooh fabric squares in the original charm pack; I used every one of them. To make the quilt wider, the six character squares in each row are separated by 2" stripes of a medium gray, which is one color that is in most of the character pieces. In between each row, to give a bit of length, there is a pretty yellow two-inch wide strip. The six-inch strips of honeycomb fabric at the ends got the size where I needed it to be. If memory serves, the quilt ended up around 40 x 56.

The quilting is where the fun started.

I stitched "in the ditch" along the seam lines to stabilize the quilt. Then...it just sat there for over a month, while I thought about it. It's been a while since I've done much machine quilting. In addtion, the batting used is wool, which is not only nice and warm, but very fluffy. What to do?

With time rapidly winding down, I decided to do flowers. After all, the Hundred Acre Wood must have some pretty flora, right? Not to mention that the baby is a girl.

In each of the character squares, there is a swirly-centered daisy. The gray rectangles got a messy rose, or peony, depending on your viewpoint. The long strips simply got a run of leaves, which is also the filler used in the end panels.

All of the quilting is done with a variegated Aurifil 40 weight thread on the top, a solid Aurifil 50 weight on the bottom. The top thread moves from a medium yellow through a very pale lemon and back. The solid thread was a medium yellow. I love the heavier weight for adding a bit of depth to the flowers. Aurifil is an Italian thread, pretty much the Ferrari to everyone else's Ford. I use their color #2600-Dove for piecing, as the light gray seems to blend in with more fabric colors than an ecru or beige.

Assuming I do have one, I'll update with a picture of the label. It was worth setting up the embroidery machine for twenty minutes of stitching, I'll say that much, as well as being in keeping with the theme.

Wednesday, July 20, 2016

A shameless plug to sell raffle tickets

Sigh. I should have known I wouldn't escape.

Last month, since no one introduced the new girl (me) at the quilt guild, I thought I'd escape the job of selling tickets for the raffle quilt being given away at the quilt show in October.

No such luck.

The raffle quilt lady was on me almost before I got my foot in the door last night.

The quilt - I will try to remember to scan the picture and post it here tonight - is a 90 x 90", very traditional looking pinwheel quilt. It's scrappy (not all coordinated colors, but a wide variety) with an off white background. I can't tell from the picture what the quilting itself looks like, but I believe it was quilted by a member who has a long arm quilting machine, so I believe it is quilted in an all over pattern.

If anyone wants to buy tickets, I'm willing to ship the quilt if you win. Groundrules:

1. Tickets are $1 each, or $5 for six. I must have payment in hand by 10/14. or I will buy the ticket and if it wins, the quilt belongs to me.

2. If you buy tickets, the stubs will go in to the drawing with my name and address (so as not to freak out the raffle quilt committee, who might otherwise think the guild is responsible for shipping), but I will email you scans of "your" stubs so you know your ticket numbers.

3. I'll send out notice of the winning number to anyone who buys tickets, preferably from a guild source, to keep things on the up and up.

I only have 24 tickets, so really, I could spend the $20 and buy them all myself. I don't exactly need another quilt, though.

This would be something that you could throw over a bed (it's almost, but not quite, big enough for a queen sized bed), use as a cuddle quilt, use for a picnic blanket. Or, for that matter, hand on a wall.

Leave your email in the comments, and I'll get in contact with you.

//done with shameless sales pitch//

Wednesday, June 22, 2016

Guilded

After a gap of some fifteen years, last night I went to a local quilt guild meeting. Guilds can provide inspiration, knowledge and camaraderie, as well as the opportunity to show your work at any guild quilt show.

In spite of not being much of a joiner, I thought the guild might do me some good. First off, I'm trying to correct the "Diane doesn't get out much" state of my life. Ever since I bought the condo almost five years ago, I find myself quite content to hang out at home. There is always something to be done, whether it's maintenance, hobbies or plain old housework.

Second, being part of the guild should help me get more advance notice of some of the quilt happenings around the area. I often don't find out about shows or classes until a week or so before they happen, and I'm short on either cash or time.

Third, it should help me discover whether or not there would be a market for long arm quilting services, should I decide to become more serious about developing a business as a retirement project.

The group has shrunk since I last was there, from over one hundred to just under fifty members. It's a bit concerning; you do want to make sure you are constantly recruiting new, younger members so the group will continue. I had to laugh when the woman organizing the raffle quilt for the quilt show talked about wanting to set up a database of people who want receive an email blast related to upcoming events - she said it was time to bring the guild "into the twentieth century". I didn't have the heart to correct her.

Speaking of updating communication, they decided to shutter their long-dormant website, as apparently no one knows how to maintain it. I took another look, and from what I can see, it is a WordPress blog. I'm thinking this is a tangible way I can contribute immediately, and help bring the guild "into the twentieth century".

If nothing else, being part of the guild will help me work to finish some projects, just to bring them for show and tell.

Wednesday, January 27, 2016

Challenging year

I've never paid a whole lot of attention to posts online trumpeting the latest challenge. Food, eating plans, books to read, fitness - eh.

That changed last May when I joined up in a quilting challenge. I managed to completely finish three of the seven mini quilts during the actual challenge, as well as completely piece and layer a fourth. I've designed (in my head, anyway) the remaining three, to the point of having the fabric on hand.

Not bad, considering the short turnaround time and the fact of a more-than-fulltime job.

I've declared 2016 the year of finishes, in all areas of my life. Quilting just happens to be one of the easier areas to tackle. To that end, I've entered a challenge for the month of February:

The Drop and Give Me Twenty challenge, run by Beth Helfter via a Facebook group.

The object of the DAGMT (why on earth does that acronym always make me think "dadgumit"?) challenge is to spend a minimum of 20 minutes per day quilting during the month of February. The real end goal is to finish up some UFOs (unfinished objects) that could otherwise become TOADs (trashed objects abandoned in disgust).

While I don't have anything that would ever be considered a TOAD, I do have a considerable backlog of projects in process. Time to buckle down.

Did I mention there are sponsors and prizes?

Sometime over the weekend I'll post a list of things I need to work on this month. Ideally, I'd put up a post each day chronicling my progress, but that would take away from quilting time. We'll see how that goes.

Twenty minutes doesn't sound like lot of time (and note that is a minimum), but a lot of progress can be seen when you are consistent about it. I've the luxury of a separate studio where the machine is always set up. In fact, I may set up both machines for this month, the better to switch between things that have different settings.

Four days to organize, then off to the races!

Monday, January 18, 2016

New Year goal: Project completion

Piles lean precariously in multiple spots in the sewing studio, a sure sign of scatter brained behavior. In other words, not really finishing one thing before moving on to another.

Well, this is going to be the year of endings. Finishing things, or deciding they need to be handed on to someone who will finish them.

Over a year ago, I bought a dozen kitchen towels to embroider. A basket full of towels sits on top of the refrigerator; I generally go through one a day. After almost ten years of use, the ones I'm currently using are showing signs of age. Besides, it would be good practice to do so many, knowing they aren't meant as gifts and I can just...play.

Well, I ended up making a set of towels as part of a silent auction donation for the 2014 Christmas party, then two sets for the 2016 party. There were six towels in the pack I bought for the 2016 donation, two each of red, blue and green borders. The red and blue ones were used for the donation. The green ones? Well, my kitchen is blue, as are the towels I mean to do for me. But a friend has a passion for gingerbread people, and I had a cute set of gingerbread applique patterns, so...

None of these have been trimmed or cleaned up yet, but they are too cute not to share. The gingers are in the hoop applique - the body of the gingers and the bows are pieces of fabric, positioned on the background, tacked down, trimmed, then embroidered over.

The other two are actually two of my towels, finally. These are filled embroidery; the design is made entirely of machine embroidery. It was the first time I'd done a filled design that large (each chef is roughly 4 or 5 inches by six inches), and they took forever to stitch out. The result, however, was worth it.

Well, not worth it enough for me to do all twelve in filled designs. I've done another eight in bluework, where the outline and a few details of the chef are stitched in blue thread. Two more will be done with the high end design company's version of French chefs. That will need to wait until I have an entire weekend and more patience than I did today. Those designs are rather...intense.

Ah, but that's not all. After discovering I had bought the wrong foot for a scarf hemming project (long story not worth retelling), I moved on this afternoon to experimenting with the binding attachment purchased at the closing of my beloved local quilt store (purchased for half price - even I'm not crazy enough to pay full price for it).

When you feed your unfolded bias binding into the hopper on this attachment, it miraculously folds it and snugs it around the edge of the piece you are binding, just before the binding/quilt reaches the needle that sews it down. My "practice" pieces are the owl embroidered charity quilts.

I did the first one today.

As you can see, it works a treat. There is a definite learning curve (which is why I didn't photograph my very clumsy corners) and a certain art to using this thing, but for smaller projects, these single thickness fleece blankets and things like hot pads and placemats, it will be a great time saver.

Ordinarily, I'd have used green or blue thread to sew this on. Somehow, I knew I'd be ripping out, unsewing a bit as part of the learning process; the white thread is much easier to see when ripping.

Note that neither of these projects is actually done. There are still a couple of towels to embroider, not to mention all of them to do the picky, time consuming clean up work for. This owl quilt is done, but there are six more in the stack (each one bigger than the one before it).

Still, a decent start on a bitter cold Monday.


Friday, October 16, 2015

Vacation week's end

The way I count it, today was the last day of this week's vacation. Much to do yet over the weekend, some of which is fun vacation-type stuff, but I also need to get ready for what will be a busy work week.

When last I wrote, on day one, the week was off to a foodie start, at least until the open enrollment materials for next years's health plan came and gave me a bad case of heartburn.

Organizing, napping and cleaning took over on day two. Pam came over for a craft day on Monday, and another dear friend came over for an easy lunch and chat on Tuesday.

None of the bigger projects has gotten done (hanging curtain rods, sealing a drain), but I've spent a considerable amount of time in both the kitchen and the sewing studio, both of which make me happy. While it is a bit of a pain to do, chopping myriad veggies all at once is a time saver for me; so much nicer to just grab a container of pre-chopped onion from the fridge when I need some for a recipe. Leeks, too. The celery, carrots and many, many mushrooms were used right away in a mushroom-barley soup, some for lunches this week and some frozen for lunches next week.

I've mentioned before the Focus Through the Prism quilting challenge in which I'm participating. You may also recall that I've only finished one of the 20" square wall quilts in time to be in the drawing for prizes for the month in which it was made.

The very first month (June), the block was a Monkey Wrench, better known as a Churn Dash. The top was pieced in plenty of time, but I managed to hang up on the quilting. These small quilts, which will be mine, rather than a gift, were meant to be a place to play and experiment with both design and machine quilting.

Only I'd forgotten how to play.

I started a bit of quilting, didn't like it, and had to tear it out. One of the reasons I didn't like it was that my hand/machine coordination was off, and the stitches were tiny. It took forever to tear out just the stitching - not the fabric - in about two square inches.

This week, though, after having been messing around for a number of days, I just sat down and started in. It's not perfect, but it is done.

Without bothering to overthink things, I immediately put the borders on the September quilt (Wild Geese) and layered it up to quilt. Hmm. A bit stymied on the quilting again, so I switched gears and reached for the August Pinwheel block design sketch. That particular quilt has a three dimensional block, something I'd not done before, even though it was incredibly easy. Once that one was pieced and layered, I jumped in with the quilting.

Variegated thread, an easy looping pattern. Borders done in a new-to-me triangular geometric meander. Finished quilting and binding today.

That's two mini quilts finished in two days. Maybe, just maybe, I can get the goose one quilted and bound before Monday as well.

That will leave me only two behind - the friendship star from earlier in the series, and the nine patch for this month.

Pictures closer to the end of the weekend, with hopes I will indeed have all three done.

All this is really to remind myself how much I enjoy quilting, and how much fun it can be to just sit down and go, without overthinking things, without having to (much) watch the clock. Experiment. Practice. The little "pebbles" I hated quilting were much, much easier when disconnected a bit and used on the Pinwheel, since I'd already done so many on the Monkey Wrench.

Yeah, they don't let me be so creative in my usual day job.

Cleaning, cooking and a bit of sewing tomorrow, then a housewarming party. I plan to be home fairly early; I've a mushy book to read while sitting in front of the fire with a glass of wine. Probably be snuggled under a quilt, as it's going to be pretty doggone chilly the next couple of days. Sunday, more getting ready for the work week. Ugh.

Do I really have to go back?

Sunday, September 20, 2015

The rest of the weekend

Making soup wasn't the only thing I did this weekend. I have two quilt challenges due before the end of the month and an embroidery project for a friend to do. My goal was to at least get the larger quilt project pieced, and the smaller one designed, before the weekend was over. I made a little more progress than that:

Wild Goose 20" challenge quilt September
Through the Prism Challenge

The angle on this is a bit odd, but this is the mini quilt for September, based off the wild goose chase block I posted on last week. Looking at it, I probably should have added a straight line of geese in the lower left corner, leading up to the geese that circle around. Eh. The point is the play on words, as there is a "wild" goose going off on his own in the upper right. The focal color I chose for September is orange. The background is a marbled grey batik. This is all pinned together, ready for quilting.

Owls again - 8 x 10" mug rug

It's a bit blurry, but this is a "mug rug" - a small quilt, generally the size of a letter size piece of paper or smaller, though not always rectangular. Right now, it's considerably oversize - made that way to make sure I'd be able to put the owl where I want it. This is for an exchange. The person I am sending to likes bright colors, birds and cats. So I went ahead with another owl on a bright blue background. The fill quilting in the background will be fancy feathers, I think. 

This last bit is an embroidery project for a friend. He had a quote he wanted embroidered so it would look like "his grandma made it". There are some limits with the size of font I can use and still have it both pretty and legible (this one is 1/2"). Because it's a font rather than an alphabet, each letter needs to be chosen and aligned separately. Once I had it all in, I changed the colors on the screen and hit the "combine like colors" button so that the sewing computer realized all the lettering was the same color and not separate motifs.

Oh - language warning, too.

Matt's quote

The colors are off in the picture. The lettering is a bit brighter, and the flower is a pretty peach. I still need to cut off all the thread tails and the jump stitches (thread carried over between stitches), but I think I have a frame that will fit that already has embroidery stretchers.

And that is pretty much it for the weekend, other than doing a little more cooking and a lot of dishes. Which reminds me - I loaded the dishwasher last night, and still haven't run it...


Saturday, August 01, 2015

Whooo's having fun on a Saturday

In spite of getting a full night's sleep, I woke up a bit out of sorts, about quarter to six (that is actually pretty late for me; four-fifteen is the usual time). After messing around for a bit, I went back to bed for an hour.

Didn't help the mood.

A houseful of groceries did, though. Fried up some potatoes, onions and mushrooms and topped the mess with a couple of scrambled eggs. The two cups of coffee probably helped.

The plan was to spend a good part of the day sorting things to give away. Easter Seals is picking up the third Wednesday in August. Since it finally is August, I'd better start sorting.

Eh. Didn't feel like it.

I wandered into the studio, intending (really) just to put away everything from the Crazy Cabin project. But part of the "mess" is a stack of fleece cut into various sizes, meant to be made into little blankets for Project Night Night. I'm waiting for the fabric I ordered for a quilting job for a friend, so...

Owls.

First owl. The color of the thread on that bottom
piece isn't as pink in real life.
Second owl. Who says the owl has to be "owl"
colors?
There are seven of these  little fleece blankets all told. Once all the embroidery is done, I get to play with the binding attachment for the machine. In theory, you feed your long bias strip into the attachment, which screws into the bed of the machine. The gadget double folds the strip and lines it up perfectly around the edge of your quilt or fabric as you feed it into the machine, sewing it all down. By the time I finish binding seven of these (not to mention turning 28 corners), I should be an expert.

Project Night Night includes a blanket, a book and a stuffed animal in the totebags for the kids. When I saw this, how could I resist?

These are pretty small - in spite of what it looks like,
there are only two sizes, the larger of which
finishes at nine inches tall.
The fabric I'm using for the applique is all bird themed - feathers,birds, swirly things and more feathers. I've more than enough to make a stuffed owl for each blanket.

This is all an "in between" project - something I work on when I'm not actively trying to get something else finished. Each owl takes an hour or so (I actually simplified the second one, reducing the number of applique pieces by three) plus the time to set up, cut stabilizer, chose fabric and find thread. I've a number of these kinds of filler projects; getting some of them done will decrease the volume of stuff in the studio.

Thursday, July 30, 2015

Through the Prism July - Crazy Cabin

Back in April I joined a quilting challenge. You haven't seen anything posted about it, because I missed the deadline for the first two months thanks to busier than anticipated...things. But I'm on track, have July done and a plan to finish up the May and June miniquilts.

The rules are simple:

Purchase: Special ROYGBIV fabric Bundle from Cherrywood Fabrics

What: One block-inspired challenge will be issued each month for seven months. Use that block, plus ONE fabric from your special ROYGBIV bundle, then add anything else you need to create a 20” finished quilt by the month's deadline.

- Each final project should read predominantly as one color in the spectrum: red, orange, yellow, green, blue, indigo, or violet.
- A ROYGBIV hand-dyed color bundle of fabric must be purchased from Cherrywood Fabrics
- You must use ONE fabric from the ROYGBIV challenge bundle in each quilt
- Any other fabrics from your stash may be added.
- You must use the month's block
- Quilts must finish 20” square.

Challenges must be completed by each monthly deadline.
You can participate in as many monthly challenges as you’d like (one, or all seven!) but each challenge quilt MUST be started and finished within that month.

For July, the block for the challenge is the traditional Log Cabin block. The chances are you have seen this block: a square center (most traditionally red or yellow to represent the hearth) is surrounded by "logs", added to each side in sequence around the center. Because of that, each log is slightly longer than the one on the previous side, giving a stair-step diagonal to the block. It can be colored many different ways, arranged even more. To see a good overview of the kinds of traditional quilts possible from this block, simply Google "traditional log cabin quilt" and take a look at the images.

The basic block looks like this:
The block, however, is only the "inspiration", a jumping off point, if you will.

One of the reasons I joined this challenge is to be able to play a bit. With all that's gone on in the last few years with moving, the change in responsibilities at work, the sewing studio being the last room unpacked, the learning curve of the new machine and the need to finish projects meant for others, my skills seem to have acquired a layer of rust. Time to sand some of that off.

The starting point of my primarily indigo quilt was a rough, five sided...blob. Yes, that is a technical quilting term. I hacked off a piece of the Cherrywood indigo (the hand dyed fabric has a beautiful hand, soft and suede-like; I would love to make a skirt for winter out of it (lined, since the cotton alone is a bit light for our Wisconsin winters)). From that odd center, I proceeded with a traditional log cabin assembly, adding a "log" to each side in turn around the center. A few logs were cut a bit on the diagonal after attaching them, just to keep things interesting.

Once the piece was large enough, I cut a 16" finished square, and added 2" borders of the Cherrywood fabric all around to bring it up to 20" square.

Then the fun started. I spent a couple of hours playing on a scrap quilt, trying out the various decorative stitches on the Bernina 830. Hundreds are available. I tend towards decision fatigue when faced with too many choices; I put about two dozen samples on the practice piece, and chose my final stitches from that limited pool. At the same time, I pulled out a number of different types of thread: polyester embroidery thread, shiny rayons, a metallic or two, a variegated cotton.

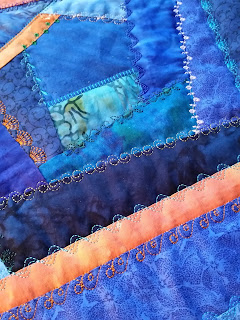
Each seam is covered by a decorative stitch, crazy-quilt style. The final border has a free motion, ribbon-like curl motif (and boy, am I rusty on that, too). The binding, true to the scrappy look of the cabin, is pieced from several of the "log" fabrics, joined with a diagonal seam.

It's a slightly non-traditional log cabin block, done in a crazy quilt style.

What better name than "Crazy Cabin"?
In process. The decorative stitches serve as the quilting,
holding the top, batting and back together.

Full quilt, finishing at 20" square. A little bit of orange
to brighten it up a bit.

Close up of some of the stitching.
To see more of the incredible quilts, plus take a look at the May and June entries, go to Persimon Dreams and click on the links in the right sidebar.

Saturday, July 25, 2015

Perfect weekend in progress

Just before I left work yesterday, I said on Facebook (I know, but it was the last thing I did before I shut down the computer) that the weekend plans were "sew, read, nap and grill - not necessarily in that order". By the time dinner arrived yesterday, I had accomplished three of the four.

It's just too hot to fuss with the grill.

Today was a repeat of yesterday, with a trip to Starbucks thrown in. And sleeping a bit later than usual. And a cobbled-together-from-leftovers dinner that was extraordinarily good.

The "reading" is the newest book by Kathy Reichs, the forensic anthropologist/author upon whose books the series Bones is loosely based. Temperance Brennan is considerably different in the books, personality-wise: less socially inept, more of a risk-taker, a recovering alcoholic. Originally, I had planned to wait until today to start the book...yeah, I started Thursday night. I will easily finish it tomorrow. So nice to take uninterrupted time to read.

The "sew" portion of the weekend's entertainment is on a small (20 inch square, finished) quilt for a challenge in which I'm participating. We are given a specific block each month to use as an inspirational jumping off place. In addition, we all bought a packet of seven hand dyed fat quarters, one each in red, orange, yellow, green, blue, indigo and violet. Our quilts must use one of those fabrics (our choice which color to use when) and "read" as mostly that color.

July's block is a traditional log cabin block. I'm using the indigo, a fairly deep blue, as my primary focus. It's been interesting just taking off and sewing on this one. I'm usually much more of a planner, but once I figured out my concept, the best way to do the thing was just to do it. I will say that this particular work has me playing around with different types of thread (the new machine handles metallic threads beautifully) and many of the hundreds of decorative stitches loaded in the machine. Oh - and there may even be a bit of embroidery before I'm done. Pictures will be posted on July 31st or August 1st (pictures need to be put on the challenge website by 10 p.m. the 31st; I may not get a post up here until the 1st).

Two naps taken so far, one "official" (take out the contacts, get in bed, set the alarm for no more than an hour and a half) and one "unofficial" (sit down in the recliner, close my eyes "for a moment" and wake up anywhere from fifteen minutes to two hours later). Both were thoroughly enjoyed.

Off to bed soon. There are things that I need to do tomorrow, but I'd still like to repeat today as much as possible - sew, nap, read.

Can't think of a better way to pass the weekend.

Friday, July 10, 2015

Fabric-ish goodness

About time for some pictures.

This is the tshirt quilt - my first commissioned quilt. I swear the shirts laid nice and flat at the beginning. They are backed with fusible interfacing to keep them from stretching, but stretch they did. I didn't want to cover up the shirts themselves with quilting, so it is what it is.

The nice thing about this is that there were only six shirts, rather than the dozen or more that are typical for a tshirt quilt.

The "Haugh Holiday" commemorates the day my friend and her husband first met. It's turned into a family thing the last half dozen years, with the entire family - parents, kids and grandkids - taking a day trip somewhere fun. I got the dates and locations, and embroidered all the locations, and dates where they were missing. Being a bit type A, I also arranged the shirts in date order in the quilt.

We had agreed on a "blue jeans" kind of theme, since when you think tshirts, you think blue jeans. But the blue just laid there when I did a sample layout. Orange is blue's complement, but a little goes a long way. It's not my favorite color (nor my friends either, as I found out later), but it was just what was needed to make everything sparkle. The orange around the shirts is a tiny flange, not an inset border.

To balance out the arrangement (and help make the quilt a little bigger and usable), we decided to put the family theme verse as the center block. The embroider pattern is from a wonderful website called designsbyjuju. If you have an embroidery machine, check them out. These charity quilts used one of their designs as well.


This next picture is here mostly to show the quilting (enlarge and look at the lower left corner). I tried to mimic a bit of the pattern in the fabric - some circles with ruffled edges, swoops with pointed ends. The pattern was fun to do, even though I could tell my machine quilting skills are a bit rusty. To avoid frustration, I quilted this on my older machine rather than the fancy new one. The old one fits in the sewing table, so the table and the bed of the machine are one height. It's much easier to move the quilt around when that is the case. The new machine doesn't fit in my table. I would have had to constantly lift the quilt to make sure it didn't get snagged on the machine's extension table.

Eventually, I'll get another sewing desk that is designed for the bigger machine, but I've other things that need to come first.

One of the side benefits to working on this is having the studio a bit more arranged and organized. I finally know where everything is, and everything is where it makes sense. Things need a bit of tweaking, but I still have about half a dozen odd boxes to move or completely empty before I do that. I'd like to work in the room a bit more before I make any final decisions, anyway.

Last, here is a teaser of the project I worked on during craft day last week. Fabric cut in strips, then tied on a wire frame. There are nine sections to the wreath.

Unfortunately, this picture shows mostly the back side of the fabric. Next time I make one of these (I'd like to do one for each season for the front door) I'll use all batik or thread dyed fabric, which are fully pigmented on both sides (why yes, my type A is showing again).

That's about it for creative stuff lately, except for something else I'll reveal shortly.

Saturday, November 01, 2014

Raindrops

This last winter I put together a kit quilt (the pattern and preselected fabrics are sold together as a unit), intending to use it as a baby gift. When I got done, however, I realized that the theme - all rain related fabrics - was a bit depressing for a kid's quilt, even though one of the prints was a cute rainboot one.

It languished in the "give me away sometime" pile until a annual silent auction for cerebral palsy came up. A dear friend's sister has a daughter with CP. I'd been to the fundraiser in the past; it's pretty low key, but brings in a nice chunk of change. This quilt went to the auction (and the successful bidder was another friend of mine).

Sideways, but you get the idea.
Swirly quilt pattern. I used the Bernina Stitch Regulator on
this top, and whichever mode I was using is the one I
ended up not liking.
Then again, if I remember aright, the quilt itself was stiff
and hard to move, accounting for some of the strangeness of
the swirls. See the I Spy quilt - done about the same time as
this one - and see how much smoother the curves are.

I spy with my little eye....

Since this quilt has arrived safely at its destination, it is now safe to post pictures.

I Spy quilts are a special kind of kid's quilt. There are a lot of different ways to arrange them, but there is one hard and fast rule: the quilt must contain many novelty fabric patches. Novelty fabrics can be the licensed things like Peanuts or Green Bay Packers prints, but it can also be prints of bugs, dogs, robots, cars...anything you can think of that is representative rather than extremely abstract, and easily identifiable by a child.

You take the novelty fabrics and arrange them in a quilt, and the child can spend hours searching for the different things in the quilt. "Hey, Suzie, can you find a red tugboat?". The adult doesn't even need to know exactly where the tugboat may be - it's up to the child to find it. Most quiltmakers will include a list of searchable objects on the back of the quilt.

Aside from the cuteness factor, I Spy quilts are a unique way to keep a kid quiet and occupied when needed, giving mommy and daddy a break.

At least until little Suzie starts screaming that she found the object.

This I Spy has the novelty fabrics set with a drop shadow around the square that gives the quilt a three dimensional quality. The most challenging part of these quilts is procuring enough novelties - I cheated, went to Etsy and purchased a pack of fifty, 5 inch squares from a wonderful lady who wrapped them in pretty tissue paper, stuffed them in an envelope and mailed them to me the same day I ordered. I didn't even have to leave the house.

The turquoise is a tone on tone; the black "shadow" is a cool swirly pattern, on which the all over quilting pattern is loosely based (well, really loosely - I just kind of got into the zone and doodled all over the quilt).

I really like this one - the colors, the fabrics - it was hard to let go.

I still haven't found a great place to take pictures of quilts.
This at least gives an idea of the whole thing.
I spy...an orange dragon.
I spy...a bear with a fishing pole.
Extreme  close up of the quilting. I'm pretty sure I used the
Bernina Stitch Regulator on this - I did two quilts at about the
same time, using one of the BSR modes on one and the second
mode on the other. Forcing myself to use it for an entire quilt
gave me a good idea of its capabilities - and the length of my
learning curve.
One more picture just because I can.

I am certain I took a picture of the label, but apparently it wasn't filed in the same place as the rest of the pictures. On the back is a list of 92 things to find in the quilt. They 92? I got tired of counting, that's all.

There are thirty-six squares in all in this quilt - I've enough novelty squares left, plus some in my own stash, to make another one...some day.

Thursday, October 30, 2014

Little monsters

Way back at the end of last winter, I took a friend's old, reversible comforter and cut it into four smaller pieces. I did a bit of applique and embroidery on each, then bound them in a cute, bright stripe. The intention was to donate them to Project Night Night, a group that packages small blankets, a book and a stuffie in a canvas bag to be distributed to homeless children.

The finished quilts have been kicking around the house for months. The quilting on the comforter is a bit more worn than I thought, and I couldn't decide if I wanted to donate them, since they really want new or very gently used items. I went back and forth, but finally made up my mind to donate them.

Before that, however, pictures for my records.

All four. Two on the bright side of the comforter, two
on the lighter side.
There are three appliqued monsters, and one floral embroidery. The embroidery was a test - first time I'd done anything on something other than a single layer of fabric. While I don't have a picture of it, the back of the embroidery turned out very neat and presentable. Soft as well, which is important for a small child's quilt. The project says they often need the smaller sized blankets - these finish at about 45 x 50 inches.

Isn't she cute?

He is a darling. Should have done the words
in a different color, though.

The girl monsters have long eyelashes and are
apparently wearing blush.

The monsters are done via machine applique, but are pretty easy. You hoop up the base fabric as if you were going to do an embroidery piece. The machine will sew out the outline of the fist applique piece - in this case, the bodies. You place the applique fabric over the space, making sure it covers the outline, then then machine stitches a second straight line outline. You trim the fabric close to the outline, then the machine does the pretty satin stitch over that edge. Repeat for all the applique pieces. Then the machine finishes up the embroidery details.

It goes more quickly than you would think, though it is fussy, having to change out the color of thread fairly often. I think by the third applique quilt, I had my time down to about half an hour.

Little cuties. There are ten more "monsters" in the set, though those are a bit more complicated, with either more applique pieces or more details. These were the fist of this particular type of embroidery I've done - all things considered, they turned out well.

Thursday, October 31, 2013

31 Days - Day 31: Plaid

Blue and brown together always work. Make those plaids, and you've got a pretty great quilt.

The pattern for this one was in a magazine a while ago. The quilt itself was completed in 2010. Like the previous quilt, this one also has wool batting, but is quilted fairly densely.


It took longer to find the number of blue plaid fabrics I needed than it did to piece the top. Again, strip piecing and chain sewing helped speed along the construction of the top.

This is almost twin sized - nice for curling up on the couch, which is what I use it for. Yes, this one I actually kept.

The quilting itself, however, was a bit problematic. The plan was to quilt the entire center with a squared off maze pattern. You can see that here.

One strip was almost completely quilted when I realized I just couldn't finish the rest of the quilt this way. The sharper corners on the quilting were pushing the top around on the batting, putting puckers and areas of extra puff all over the place.

I finished the strip, then set the quilt aside for quite a while, dreading having to pick out all that sewing.


In the end, I decided not to pick it out. The rest of the quilt is done in my usual puzzle piece meander. The curves are easier to regulate, and push less of the fabric around. The quilting was done a strip at time, so one complete strip, top to bottom, is done in the square maze, while the rest are the puzzle meander. I doubt anyone but me ever notices.

Wednesday, October 30, 2013

31 Days - Day 30: Wool batting

In 2003 some friends celebrated their 25th wedding anniversary. I had enough notice that I was able to complete a quilt in time for the party. Well, actually two, but that's another story.

Up until this point, the battings I'd been using had been polyester (primarily for hand quilting) and cotton or cotton blends (machine quilting and some hand quilting). But the batting companies had come out with a new product, a wool batt that could be machine washed without felting.

Felting is what happens when you, say, wash a 100% wool sweater in the machine with warm or hot water - the fibers shrink, the nice soft wool mats and shrinks up and you are left with a tiny doll's sweater.

It's also possible to felt with a dry method, often used by crafters for specific projects.

In a quilt batting, however, felting is not desirable.

Moore's anniversary quilt
This is another quilt where the colors were pulled from a floral border fabric. I do think I should have varied the fabric used in the small corner blocks around the pinwheel, so there wouldn't be such huge green squares, but the green allowed me to quilt a large rose in each area, and have it show up quite well. The beige is quilted in a fairly dense meander.

It's difficult to see the quilting detail unless you can enlarge the picture considerably, and it is in the quilting that the wool batting makes all the difference.

First, a quick batting primer.

Polyester batting is very puffy. If you buy a commercial comforter that is nice and fluffy, the chances are it has a poly batting of some sort. When you quilt on poly batting, the line of stitching compresses the layers, and the poly batting puffs up in the spaces between the lines. Polyester doesn't breathe, so it traps heat, and quilts with poly batting are nice and warm.

Cotton and cotton blends are flatter, though you can get varying thicknesses. Because the batting is flatter to begin with, it doesn't puff up (loft) as much between the quilting as the poly does. Cotton batting also shrinks a bit (more or less depending on brand - they will tell you on the package label). With one batt, you can get the look of an older quilt, with a bit of shrinkage and wrinkling of the top. With another, the quilt will lay as flat after washing as it did when you quilted it. Ironically, cotton batting gives you a nice quilt, but not one that is particularly warm.

Wool batting combines the best of both poly and cotton. It is higher loft - it puffs up between the quilting the way polyester does. But it can be easily compressed and squished to make it easy to pass it under the machine needle when quilting, much like cotton batting. Best of all, wool breathes, keeping you warm when you need it, but not stifling you when you don't.

Quilting with wool batting is wonderful. It needles well for hand or machine quilting, squishes up so you can reach even the center of the quilt with ease when machine quilting and pops back up to give the top dimension.  I've used it again since, and love it.

A bit of care still is needed when you wash it, but overall, it's my favorite batting to quilt on.

Tuesday, October 29, 2013

31 Days - Day 29: Four Sisters

The quilt for today was made in 2005 as a wedding gift for some friends. They got engaged at Christmas and married in February; it was going to be a push to get a quilt done, but I really wanted to give them one.

So, I turned to the master of quick quilts, the Quilt-In-A-Day maven, Eleanor Burns. Ms. Burns is known for writing quilt patterns that can be put together, start to finished top, in a single (rather long) day, especially if you are well organized (and perhaps have a friend to press your seams for you). Her patterns use quick piecing and sewing techniques, are written clearly and pretty much guarantee good results.

Well, unless you are me and unnecessarily complicate matters.

You know that line on tests and patterns that says, "Read all directions first"? That means actually read, not just skim. I had glanced through the pattern, then decided it would be just fine to change things up a teeny, tiny bit.

Cindy & Ish's quilt.
Pretty, isn't it? The colors in the center are pulled from the fabric in the border, which I just love. Peachy roses on a lavender background. I had the same fabric in the reverse colorway - lavender flowers on peach - as well.

If you look closely, you will see that the green fabric in the sashing has lines of darker green vines in it. It is what is known as a directional fabric - the vines all ran the length of the fabric. You need to be careful working with them, as in many cases, you don't want the lines in the fabric to be running willy-nilly in all directions in your finished quilt.

But I'd been quilting over twenty years at this point, and knew how to avoid those problems.

Or not.

I started cutting, sewing and cross cutting the units for the blocks, using the methods outlined in the pattern. It wasn't until I was halfway done piecing the sashing and cornerstones (the beige squares at the intersections of the sashing pieces) that I realized that, if I continued with the method in the pattern, half of my sashing pieces would have the vines running the wrong way. I realized as well that I didn't have enough of the fabric left to cut the remaining pieces in the correct direction.

Off to the store to get just a bit more fabric. Fortunately, because the quilt was being made from new fabric and in a hurry, the store still the original bolt from which my first yardage was cut.

In the end, it took me about twice as long to finish the top as it should have, simply because I didn't pay closer attention to the cutting and piecing directions before I chose the fabric.

The quilt is machine quilted, with a stenciled design in the blocks, my free motion roses in the border. The sashing and small squares are quilted in the ditch (on the seam line where the fabrics are joined).

In the end, I loved the quilt and hated to part with it.

From  then on, I've made sure to completely read directions before I even consider what fabric to use.

Monday, October 28, 2013

31 Days - Day 28: The quiltmaker's daughter niece

You know the old story about how the cobbler's daughter is the one who goes without shoes, because he is so busy making shoes for everyone else? That almost happened with me and my niece. She did eventually get a quilt, but not until she was almost seven (if I remember correctly, she was born in 1984?)(I don't want to believe I am old enough to have an almost thirty year old niece).

The block pattern was labeled in the book I had as Broken Dishes, though it bears no similarity to the traditional Broken Dishes block, or any variations thereof I could find.

In other words, I have no clue what the block actually is. Give me a break - I made this quilt in 1991.

Kristin's quilt.

Red, yellow, blue and green, with white to give the eyes a place to rest. The quilt is about 45 x 60 or so, and handquilted.

Hanging the quilt on the clothesline out in the sun helps to put the quilting lines in relief. You can see the pretty simple, traditional quilting clearly.

Detail quilting.

The quilting is run 1/4 inch inside the seam lines in each of the triangles and in the white around the edges of each of the colored squares. There are diagonal lines running through the small squares.

Quilting in 1/4 inch from the seam line, to emphasize the shape of the block component, is used fairly often on hand quilted quilts. In addition, it's easier to do than sewing by hand through the intersection of two or more fabrics. Still, it gives a bit of dimension to an otherwise flat surface.

These fabrics were prewashed in hot water - I didn't want there to be any chance of the bright colors either running or crocking on to the white surfaces the first time my sister washed it.

Sunday, October 27, 2013

31 Days - Day 27: Little things mean a lot

Not all quilted projects are actual quilts. Wall hangings, table runners, candle mats, mini bags - the possibilities for quilty fun are endless.

For today, a trio of smaller quilted fun.

Add caption
This first table runner was made as a birthday present in 2001. The centers of the friendship squares are fussy cut from the border fabric. The border fabric, something I'd had in my stash, was the focal fabric for the runner, with all the other fabrics pulled from a color in the focus fabric. No pattern for this. The center blocks are 6 inches finished, I believe.

If you click on the picture, you can see the detail of the roses free motion quilted in the light blue triangles. The light yellow background is densely quilted in a meandering pattern. I can't quite make out the detail of the rest of the quilting, other than loops in the first border.

Grace's snowmen, 2005
The second small delight is a hexagonal candle mat. These are much, much easier to make than they look; I've made at least half a dozen of them, if not more. The center block is a traditional Ohio Star block. If you look closely and think about it a bit, you should be able to pick out the outline of the larger block of which the star is the center. Here's a hint: the corners of that larger block are large triangles in the snowflake fabric.

The border fabric on this one is a print of all sorts of snowmen.

Pam;s birthday - 2006
This next one is a favorite, and every time I visit Pam I threaten to walk off with it.

The runner is made entirely out of odd scraps of batiks I had in the stash. The colors are actually rather muddy - olive green, a greenish brown, muddied light blues and blue greens. But the addition of a little bit of true blue makes the whole thing pop.

You may have noticed that these blocks are also Ohio Star blocks, like the snowman candle mat center. But instead of having the traditional square-in-a-square center (the center blue square with the green corners in the candle mat), this one has a tiny patchwork. Those little squares finish at 1/2 inch. There are six of those teensy things across and over, for a total of 36 squares in each block center.

Thanks to some strip piecing, it wasn't as insane to piece as you might think. Still, it was a chore. But it's that kind of detail that makes this so much fun.

The blocks are quilted in the ditch. The surrounding triangles are densely meandered, while there is a running vine of leaves in the outer border.

Saturday, October 26, 2013

31 Days - Day 26: Spooling around

Let's jump to 1990. Back near the start of the series I mentioned that I'd done about three quilts in the peach and green color scheme, all within a few years of one another. This is the last of them. The colors are more orange and aqua, but it fits in the general colorway.

Will's baby quilt
This was for a college friend's first baby. The pattern is a spool, the colors alternating between the blocks. This is a great picture, the lighting just right to show the detail of the hand quilting.

The spool blocks are rather fun to make, and the alternating colors come up naturally if you use the shortcut method to make the blocks.

Block detail
Take a close look at the detail picture. You should be able to see that the large rectangle is made up of twenty-four smaller blocks - four across and six down. In turn, the blocks are half square triangles, where one side of the block is a triangle of solid fabric, and the other is a triangle made of two fabrics, one at the base, the other at the tip. The blocks are turned in different directions as they are next to each other in the same row, and the rows themselves alternate with how the blocks are turned.

The end result of all the turning is the spool shape that first catches the eye.

Making the striped triangle is simple. A long piece of each of the two fabrics is sewn together on the long edge. You then cut triangles from the strip, putting the long side (hypotenuse for those of you who already have the geometry figured out) of the triangle on the edge of the strip.

The fun part about doing this is that you can (and should) flip the triangle template up, so the long edge follows the edge of the top strip in your sewn together set. Those triangles will have the opposite fabrics at the tip and base as the ones you cut with the long edge on the bottom of the strip set.

And no fabric waste.

You can just see at the right of the detail picture the opposite colored blocks. All you have to do is use the opposite color for the solid triangle, and you have a negative image block. Easy-peasey. Well, easy to do, not so easy to explain without diagrams.

The quilt is finished with an eyelet lace.